On this page
- Getting started
- Organize your content, including:
- Headings
- Accordions
- Lists
- Add images, videos, and files
- Add links, buttons, and cards
Getting started
Organize your content
Headings
Headings are titles and subtitles that highlight and separate different sections of your web content. Headings should:
- Be concise and clear (3-6 words is a good length)
- Use keywords that are relevant to your content
- Be formatted as sentence case
There are different-sized headings and subheadings you can add to your content. Headings and subheadings help break up your content and give users clues about what information they can find in different sections on the page. In general, use:
- Heading 1 (H1) for the page title
- Heading 2 (H2) for the main headings
- Heading 3 (H3) for subheadings
- Heading 4 (H4) for additional subheadings
Your pages should only have one H1, and we automatically apply H1 formatting to all page titles our website. H2s, H3s, and H4s can appear multiple times on a page. Any content that’s not a heading or subheading should be formatted as regular paragraph text.
How to add headings to your content
- Highlight the text you’d like to format as a heading
- Select Format in the text editor
- Select the size of the heading you’d like to add (i.e. Heading 2, Heading 3, etc.)
- Select the Save button to publish your changes

Don't use bolding, underlining, italics, or colors to create headings in place of the formatting your headings and subheadings as H2/H3/H4. Screen readers and other assistive technology won't recognize bolded or italicized phrases as headings, meaning the content organization will not be accessible to all users.
Use headings in order
It’s important to use heading sizes in order to create an accessible content structure. Nest headings by their level. For example, if you add an H3 heading, it should come after a H2 heading. The H3 heading should be a subtopic that describes content underneath the H2 heading.
Most of your content can be organized with H2 and H3 headings. You typically won’t need to use H4 headings, unless the page is really long or complex.
Think of headings like a bullet point outline. It’s okay to add additional H2 headings after H3 or H4 headings on the page as long as the H2 heading starts a new section of content.
Here’s an example of how you could use headings to structure your content:
- Types of materials (H2)
- Books (H3)
- Ebooks (H3)
- Articles (H3)
- Popular articles (H4)
- How to use library search (H2)
- Use keywords (H3)
- Get help from a librarian (H3)
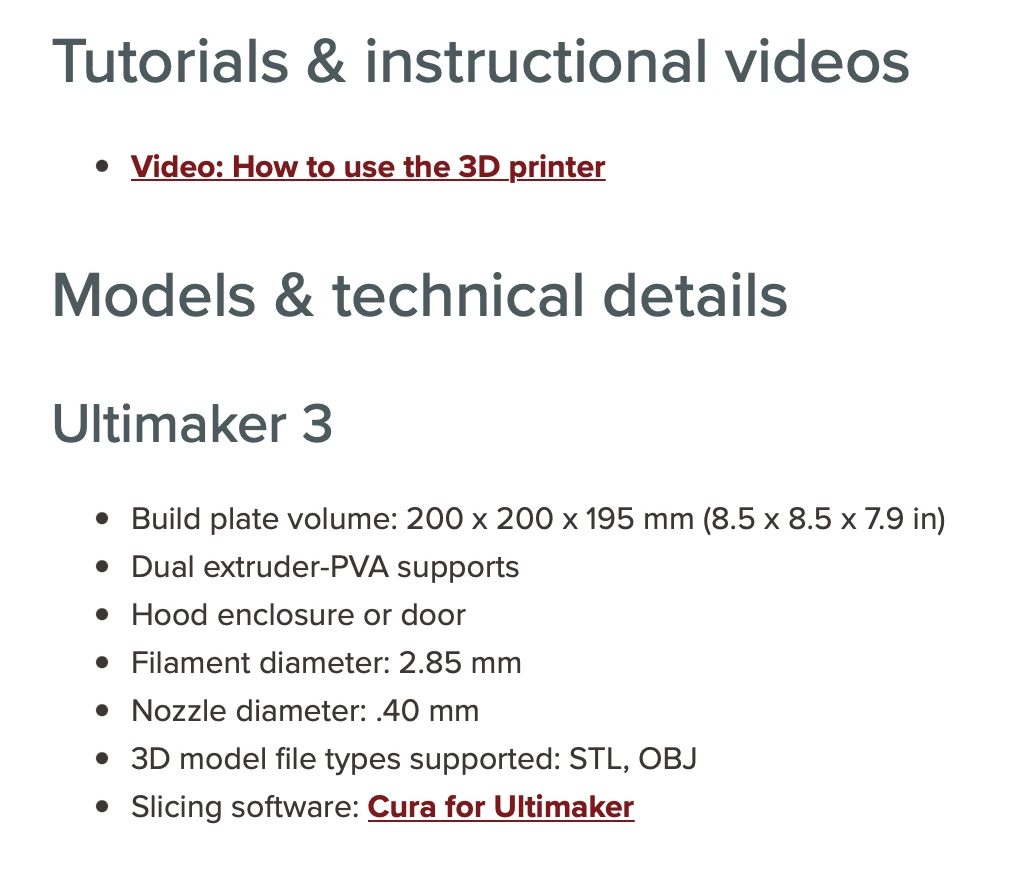
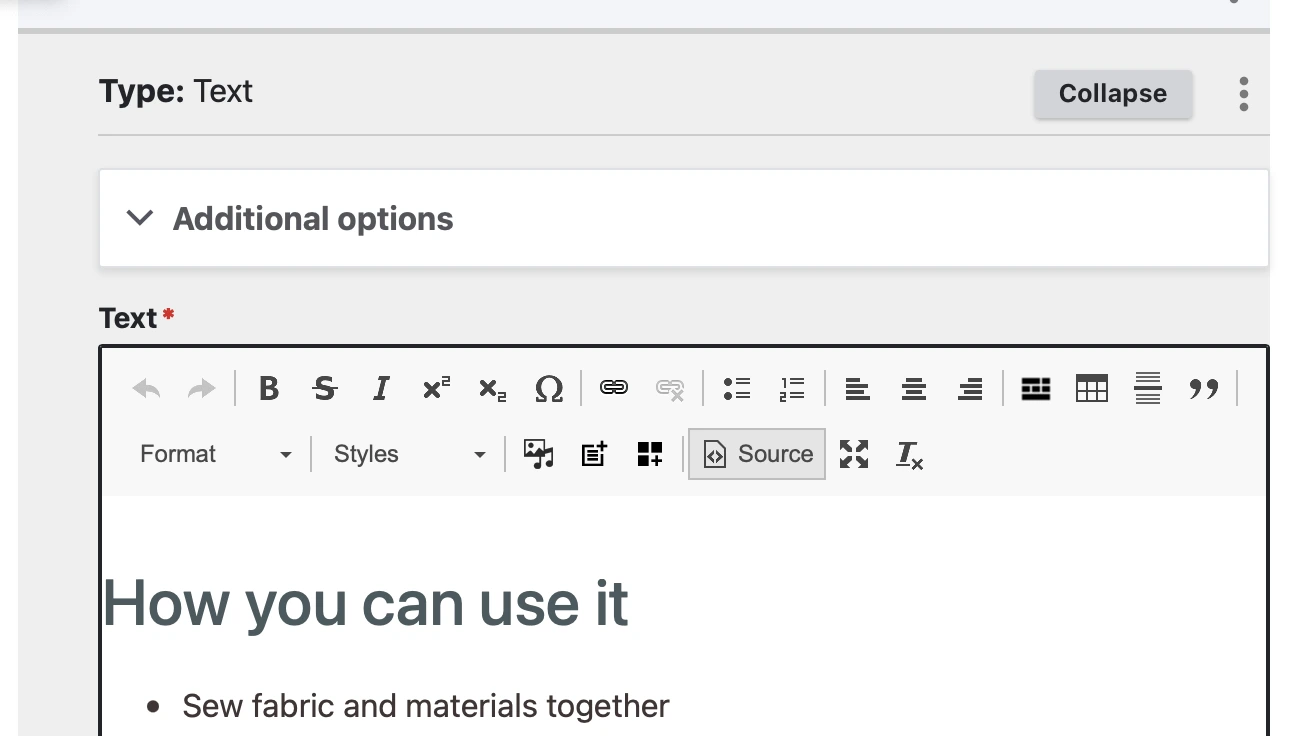
In this example, “Tutorials & instructional videos” and “Models & technical details” are both H2 headings. “Ultimaker 3” is a H3 heading since it’s an example of a model.
Accordions
TBC
Lists
TBC, include bullet points and numbered lists
Add images, videos, and files
Hero images
Best practices for hero images
- Images should be high quality (professional looking, good color contrast, and clear sharpness)
- Ideally include real people using our libraries (avoid stock photos)
- Keep file names simple (lowercase, short, and descriptive)
- Include alt text for accessibility
How to add a hero image
- Navigate to the page you’d like to add a hero image to.
- Select Edit in the first text block on the page or create a new text block by selecting Add text. Hero images should be placed at the top of the page before any text content.
- Select the multimedia icon in the text editor.
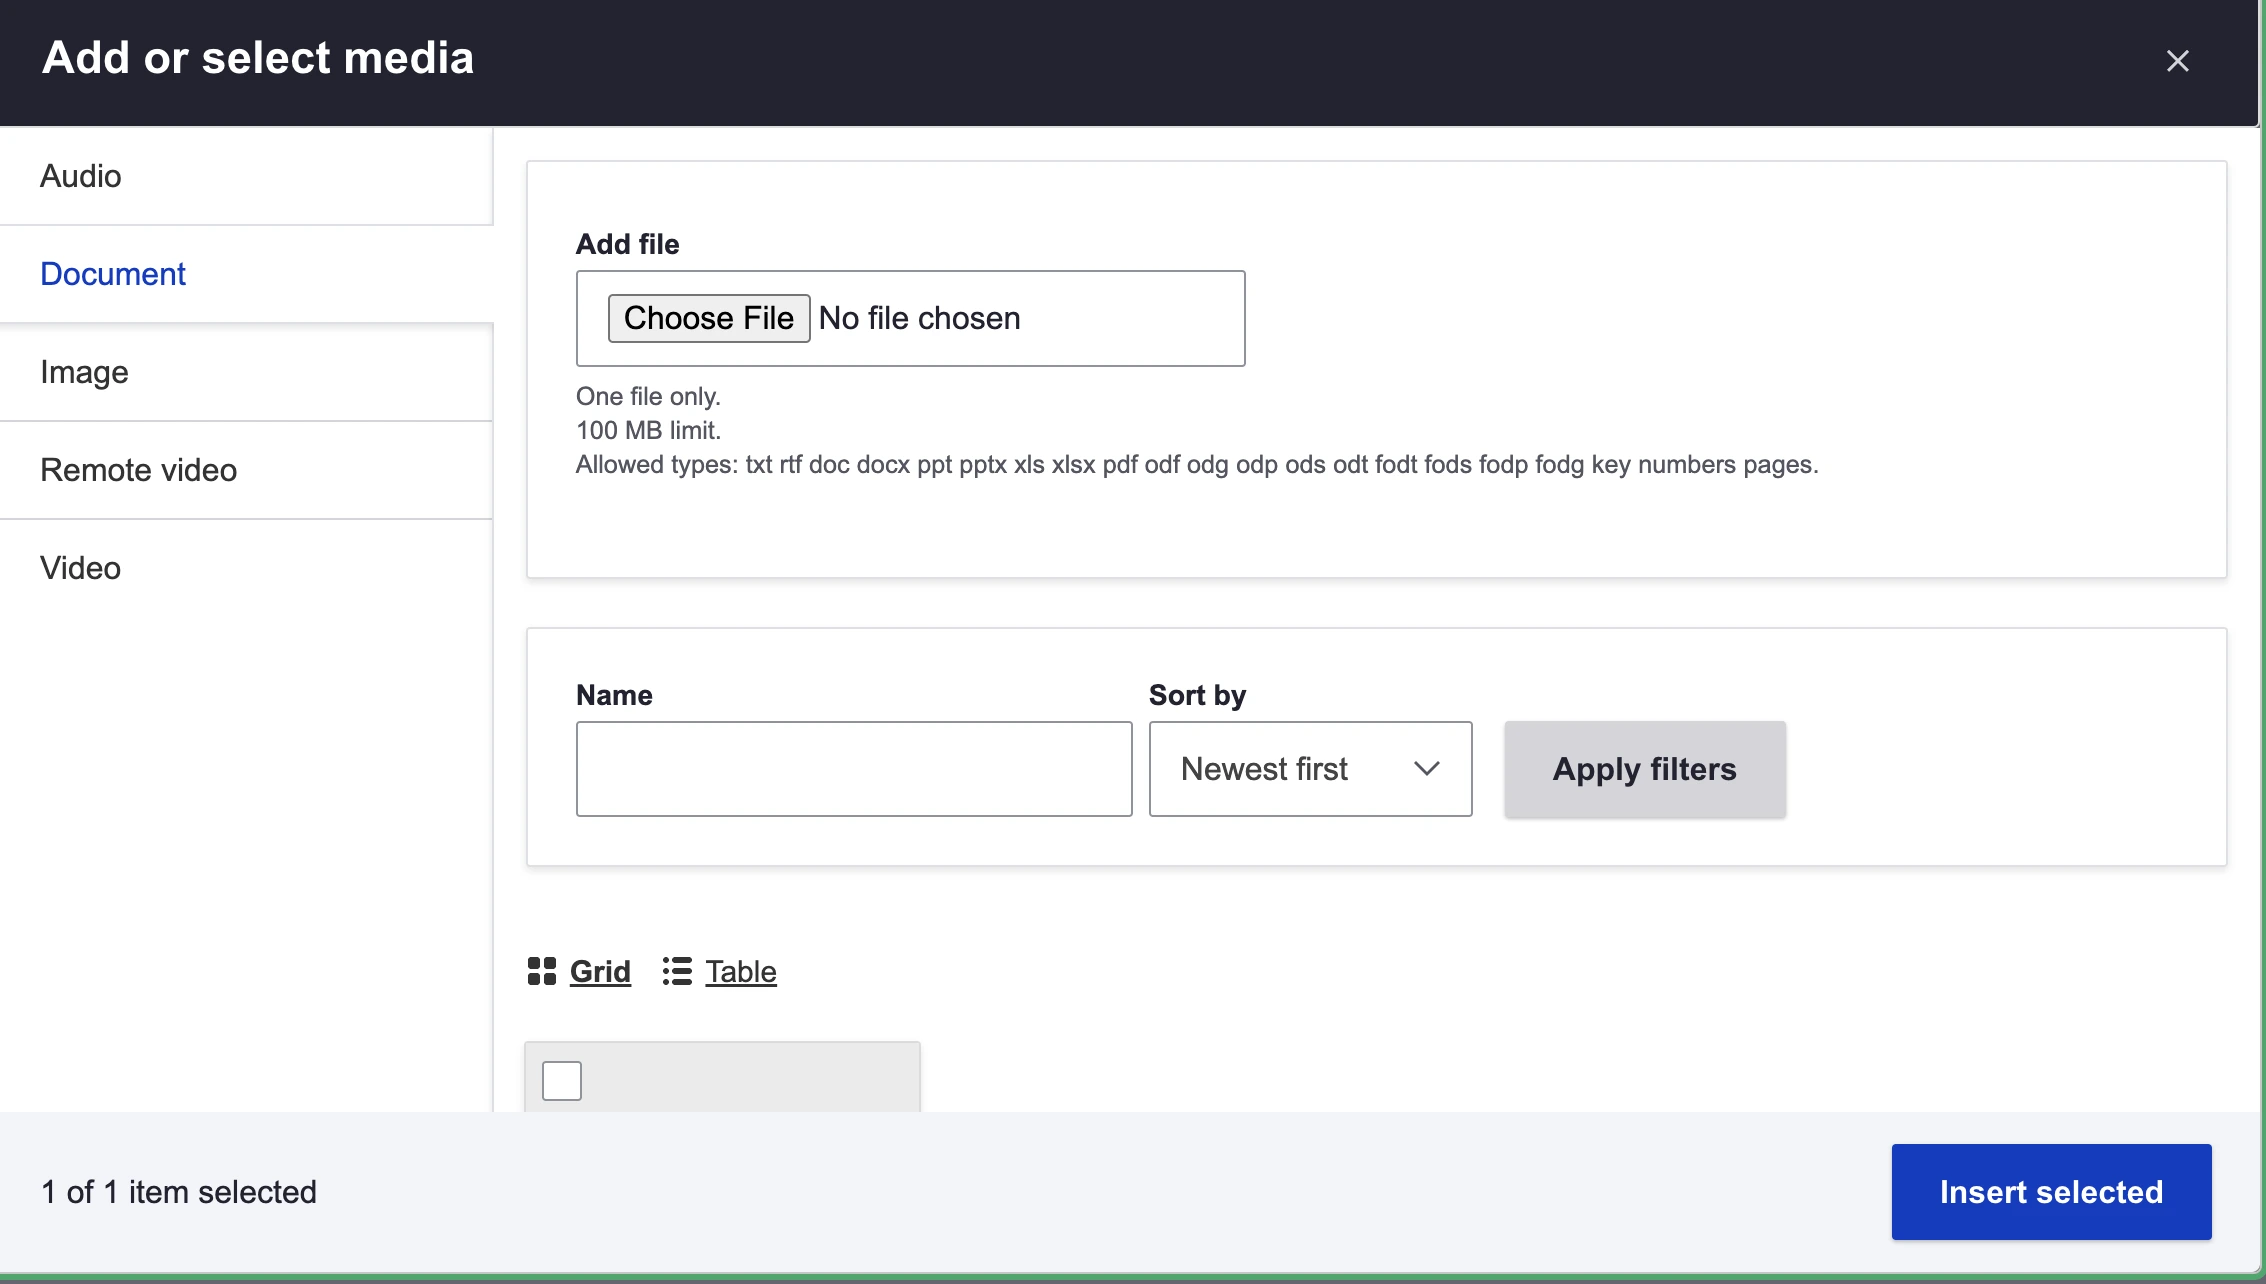
Image
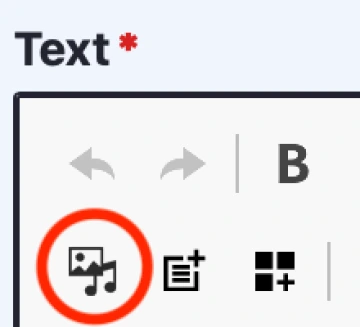
- Click on Image in the left menu.
- Under Add file, select Choose File.
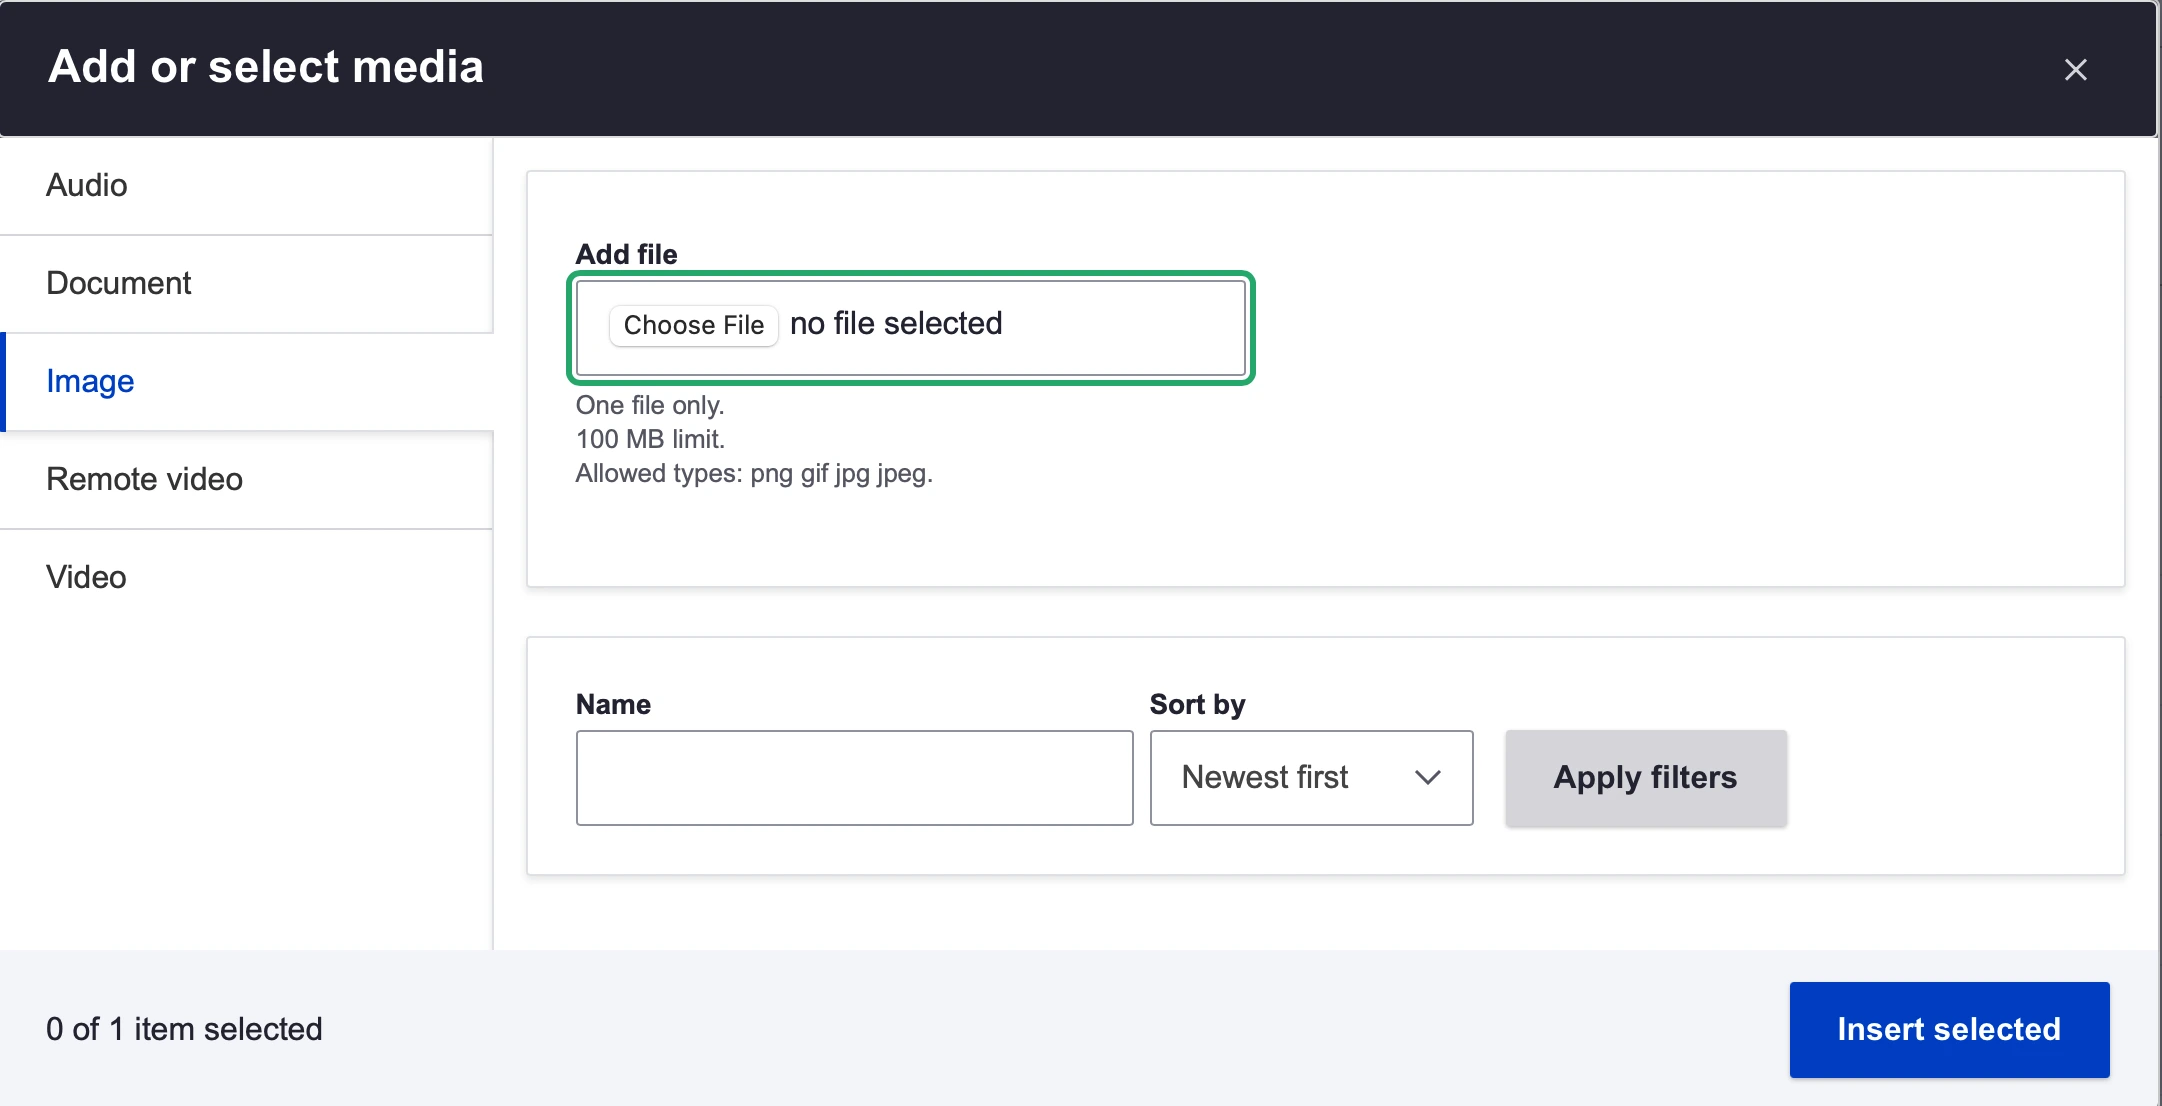
- Upload an image from your computer or from the Drupal library located at the bottom of the window. Hero images should be sized as 1140 pixels x 285 pixels and saved as a png, gif, jpg, or jpeg file.
- Add alt text to describe what the image is about for those using screen readers.
- If you upload the image from your computer, add the alt text in the Alternative text field before you save it to the page.
- If you upload the image from the Drupal library, insert your selected photo then select Edit media to add alt text in the Alternate text field.
- Select Edit media on the top left corner of the image you added.
- Size the image as large. All hero images must be sized as large.
- Use the text editor to align your image in the center.
- When ready, select Save to publish the edits to the page.
Edit or replace a hero image
- Go to the text block with the hero image and select Edit.
- To edit, select Edit media on the hero image. You can make changes to the alt text or sizing.
- To replace the image, select the image and delete it. Then, follow the instructions to add a new hero image.
- Select Save at the bottom of the page to save your changes.
Delete a hero image
- Select Edit to edit the page.
- Select the image you want to delete.
- Press the delete button on your keyboard.
Inline images
An inline image is an image that appears in the body of your content. Content managers can add images within the body of basic pages and other content types.
Best practices for inline images
- Images should be high quality (professional looking, good contrast, tone, sharpness)
- Ideally include real people using our libraries (avoid stock photos)
- Keep file names simple (lowercase; short)
- Include alt text for accessibility
How to add an inline image
- Navigate to the page where you’d like to add an image.
- Select Edit in the text block where you’d like to add the image or create a new text block by selecting Add text.
- Place your cursor where you’d like to add the image then select the multimedia icon in the text editor.
Image
- Click on Image in the left menu.
- Under Add file, select Choose File.
- Upload an image from your computer or from the Drupal library located at the bottom of the window. Images must be saved as a png, gif, jpg, or jpeg file.
- Add alt text to describe what the image is about for those using screen readers.
- If you upload the image from your computer, add the alt text in the Alternative text field before you save it to the page.
- If you upload the image from the Drupal library, insert your selected photo onto the page then select the Edit media button on the top left corner of the image to add alt text in the Alternate text field.
- Select the Edit media button on the top left corner of the image you added.
- Adjust the size of the image to fit well within your content.
- Use the text editor to align your image left, right, or center.
- When ready, select Save to publish your changes.
Edit or replace an image
- Go to the text block with the image and select Edit.
- To edit, select Edit media button on the image. Then, you can make changes to the alt text or image size.
- To replace the image, select the image and delete it. Then, follow the instructions to add a new image above.
- Select Save to save and publish your changes.
Delete an image
- Select Edit to edit the page.
- Select the image you want to delete.
- Press the delete button on your keyboard.
Videos
Best practices for videos
- Keep videos short (between 1 and 3 minutes)
- Make sure videos provide helpful content that showcases or explains a library service or feature
- Keep file names simple (lowercase, short, and descriptive)
- Include captions and/or a transcript for accessibility
How to add a video
- Navigate to the page you’d like to add a video to.
- Select Edit in the text block where you’d like to add the video or create a new text block by selecting Add text.
- Select the multimedia icon in the text editor.
Image
- Click on Remote video in the left menu to add a video via YouTube or Vimeo link. This is the method we prefer since it allows you to manage your video content on one of these supported platforms and to ensure captions are added.
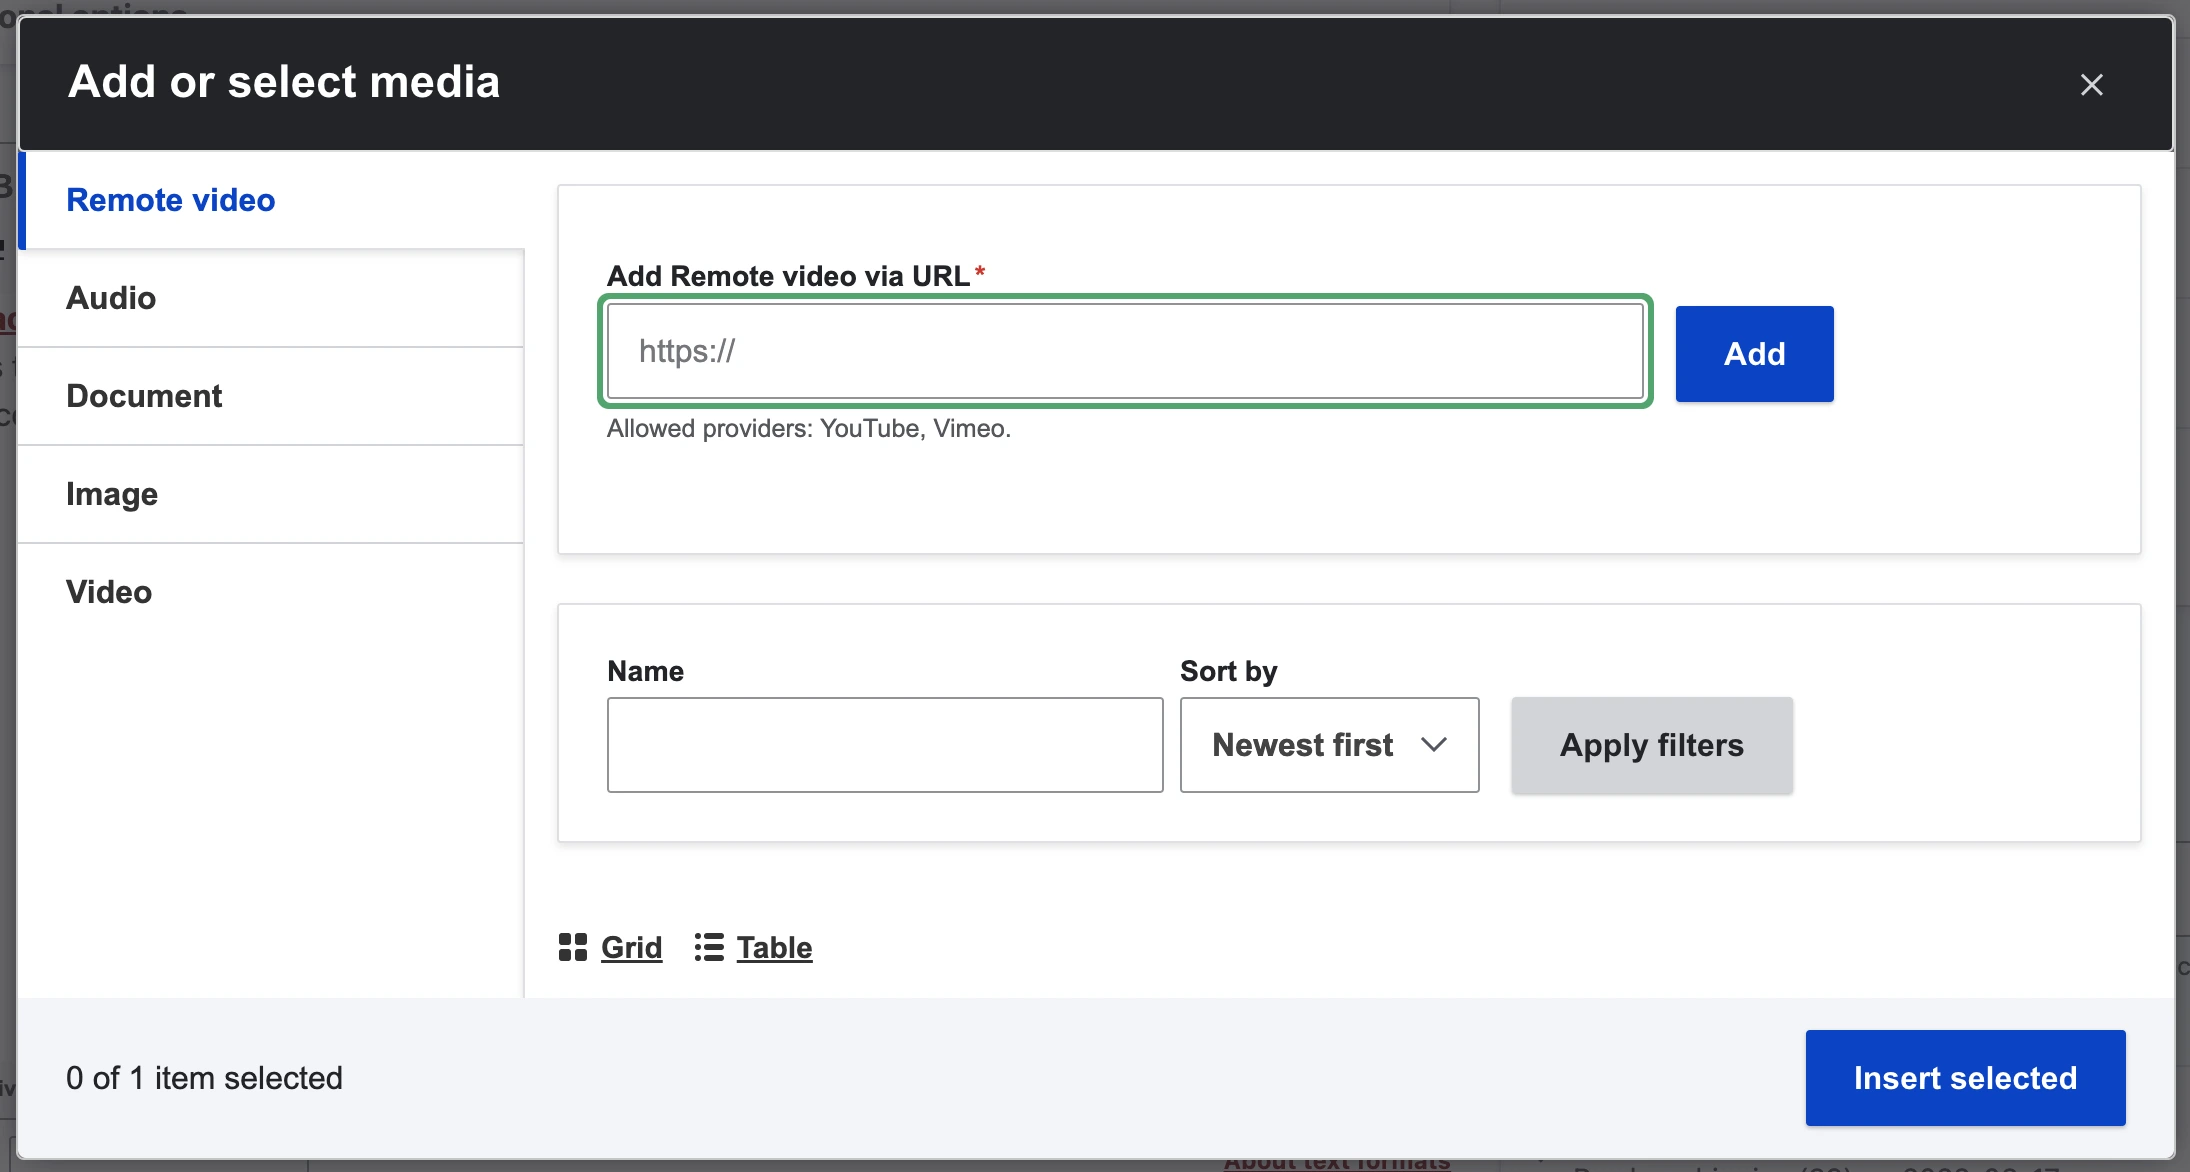
- Copy and paste the link to your video in the Add Remote video via the URL text box.
- Select Insert selected to add your video to the page.
- Select Edit media to size your video as large and to center align it.
- Select Save to publish your changes.
How to add a transcript
If you’d like to add a transcript for your video when no captions are available, you can use the accordion feature to host your transcript.
- To add an accordion, select Add accordion. Add your accordion directly after the block with the video so the accordion is positioned under the video.
- Name the accordion “Video transcript” in the Accordion Item Title text box.
- Copy and paste the transcript into the Accordion Item Body text box.
- Select Save to publish your changes.
PDF files
Content managers can upload PDF files to Drupal and link to them within content. But try to avoid PDFs if the content can be represented on a web page, since PDFs tend to be less accessible than web pages. If you're not sure if something should be a PDF or a web page (or need help converting a PDF into a web page), contact Bob.
Name your PDF files
- The file name will be what is appears as on the website, so keep it simple!
- Use only a few words to describe the document
- Omit dates, versions, and other non-essential info
- Lowercase all words
- Use spaces between words
- Give your PDF a friendly title (visible when PDF is opened)
- In Acrobat Pro go to File > Properties > Title
- Use website editorial standards (sentence case, etc)
Upload a PDF file to the Drupal Library
If you would like to upload a PDF without a specific page destination in mind, upload it to the Drupal Library using these instructions.
- Go to Content > Files>Media in the page’s top menu
- Click the blue Add Media button
- Select Document
- Under Add a new file, select Choose File
- Select Upload
- Go to URL alias if you would like to customize the URL for your document, otherwise, the URL will be the title of your document
- Make sure the Published box is checked off
- Select the Save button
Upload a PDF to a Page
To upload a PDF to a specific page, follow these instructions
- Navigate to the page you would like to edit, and select Edit.
- Select Edit on the text block you would like to add the file to.
- Select the Insert From Media Library button in the editor toolbar.
Image
- Select Document on the Insert Media side menu.
- Select Choose file or select a PDF from the Drupal Library.
- Upload the PDF.
- Choose alignment.
Add a link to a PDF file
- Go the page where you want to add the link.
- Select Edit to edit the page.
- Highlight the text you want to be the link description.
- Select the Link icon from the toolbar.
- Type or paste the URL to the PDF file.
- Select Save.
Replace a PDF file
- Go to Manage Files from the menu bar at the top of screen.
- Find the file you want to replace and click on Edit.
- Go to Choose File and browse to the file you want upload (make sure it has the same file name as the original!).
- Select Save.
Delete a PDF file
You can delete only the files you have uploaded, not all files. You should make sure the file isn't linked in any content before you delete!
- Go to Manage Files from the menu bar at the top of screen.
- Find the file you want to delete and click on Delete.
- On the confirmation screen, click the Delete button.
Add links, buttons, and cards
Links
You can add links to other pages on the the library’s website or to external websites. As a default, all links open in the same window. Links are automatically formatted red and underlined.
Write effective hyperlinks
Avoid using the following phrases to add links to your content:
- ❌ Click here
- ❌ Learn more
- ❌ Use this link
These phrases don’t clearly tell the user where the link will take them, and if they repeat more than once on a page, they cause accessibility issues.
Instead, try using clear, action-oriented language that describes where the user will go if they click on the link:
- ✅ Check our hours to plan your visit.
- ✅ Register for our workshop to learn how to cite sources.
- ✅ Read our style guide to get help with writing for the web.
How to add a link
To add a link to your web content:
- Highlight the text you want to add the link to.
- Select the link icon in the text editor. Copy and paste the link into the text field.

- If you’re signed in to Drupal as a content manager, make sure you’re copying and pasting URLs from the live website, not the admin URLs, as these won’t work for users.
- Select Save to publish your changes.
How to edit a link
- Highlight the link you'd like to edit.
- Select the link icon in the text editor.
- Enter the correct URL into the URL text box.
- Select Save to publish your changes.
How to remove a link
- Highlight the link.
- Select the remove link icon.

Buttons
You can format your link as a button to make your link more visible to users. Use buttons to highlight the most important action on the page and make it easy to find for users.
Buttons are helpful for links where the user needs to complete a clear and important task, like:
- Registering for an event
- Reserving spaces, equipment, or technology
- Submitting a form or contact request
Use buttons strategically to highlight important actions you want users to take. Including too many buttons on a page can be confusing to users and make the buttons less effective since they won’t stand out as much.
Write effective buttons
The language you use on your button should be a clear call-to-action phrase that’s 3-6 words long. Some examples:
- Reserve our space
- Submit this form
- Contact a librarian
How to add a button
To style your link as a button:
- First, add a link to your content using the instructions above
- Highlight the linked text
- Select Styles
- Select Button Red. We recommend styling your button as red. The red color is within our branding guidelines and clearly stands out on web pages. The text of your button will automatically be formatted in white and all caps.

- Select Save to publish your changes.
Cards
Cards are a feature where you can display links in a visually engaging format. Cards can bring attention to important content you’d like to highlight and provide a pathway for users to find related pages or content.
We usually include images on cards, and often use them to link to pages with detailed information about a topic.
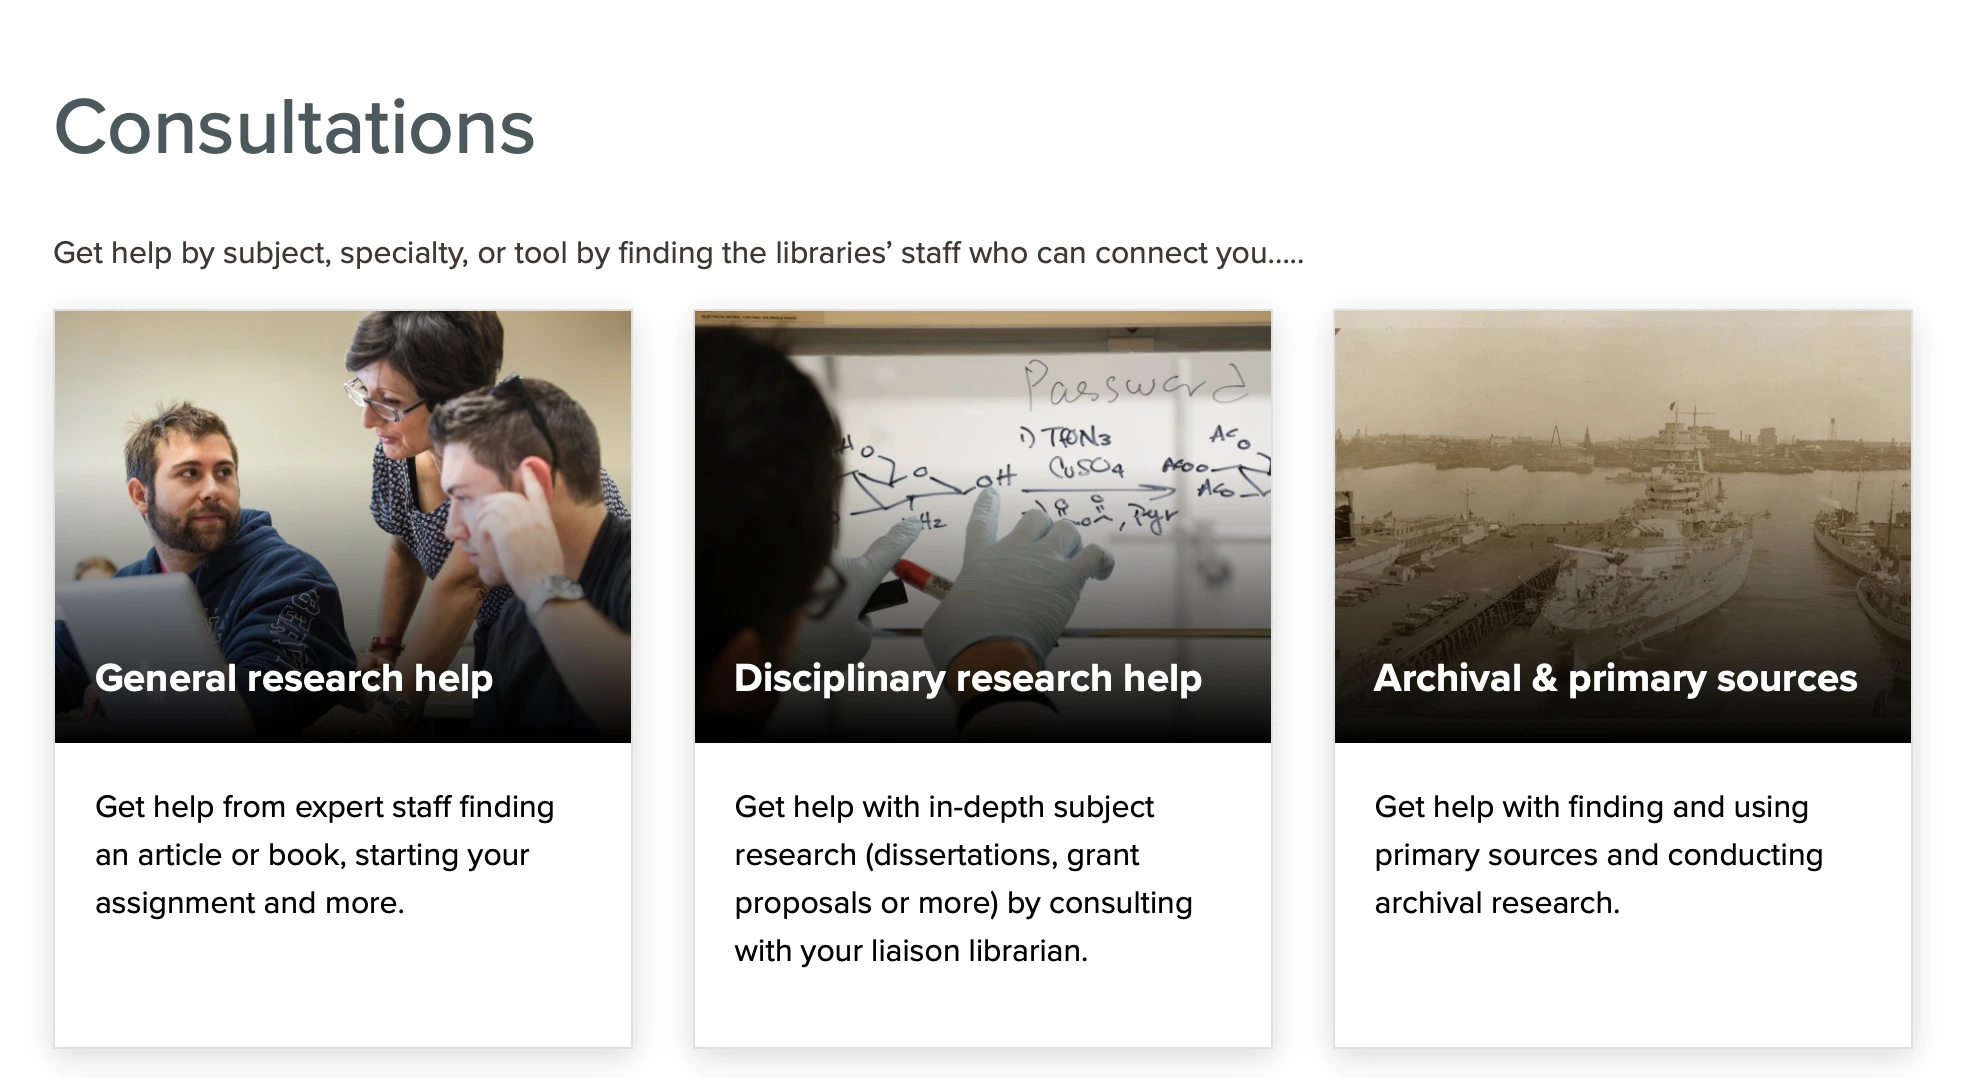
An example page with cards. The cards link out to different consultation services the library provides.
Avoid using cards for:
- Call-to-action links, such as submitting a web form or sending an email. Use a button instead.
- Text-based content that should be featured directly on the page
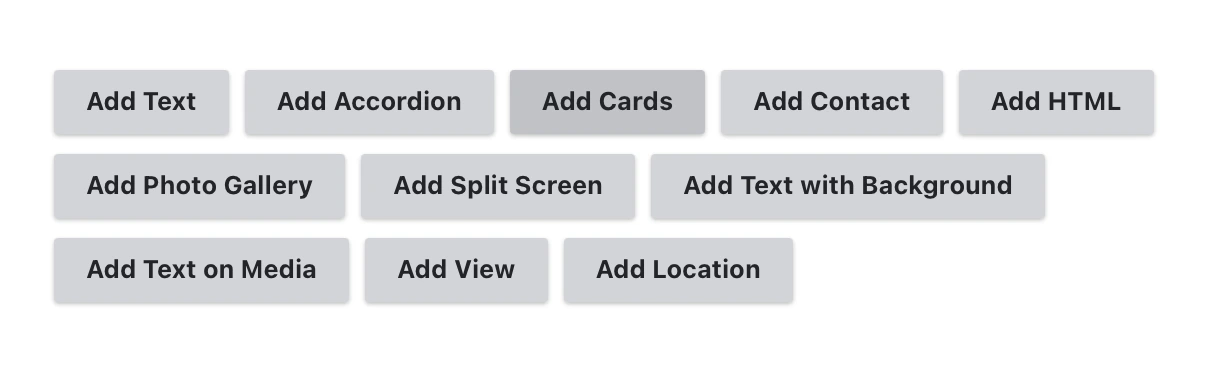
How to add cards
- Edit the page where you want to add cards. Select Add cards.
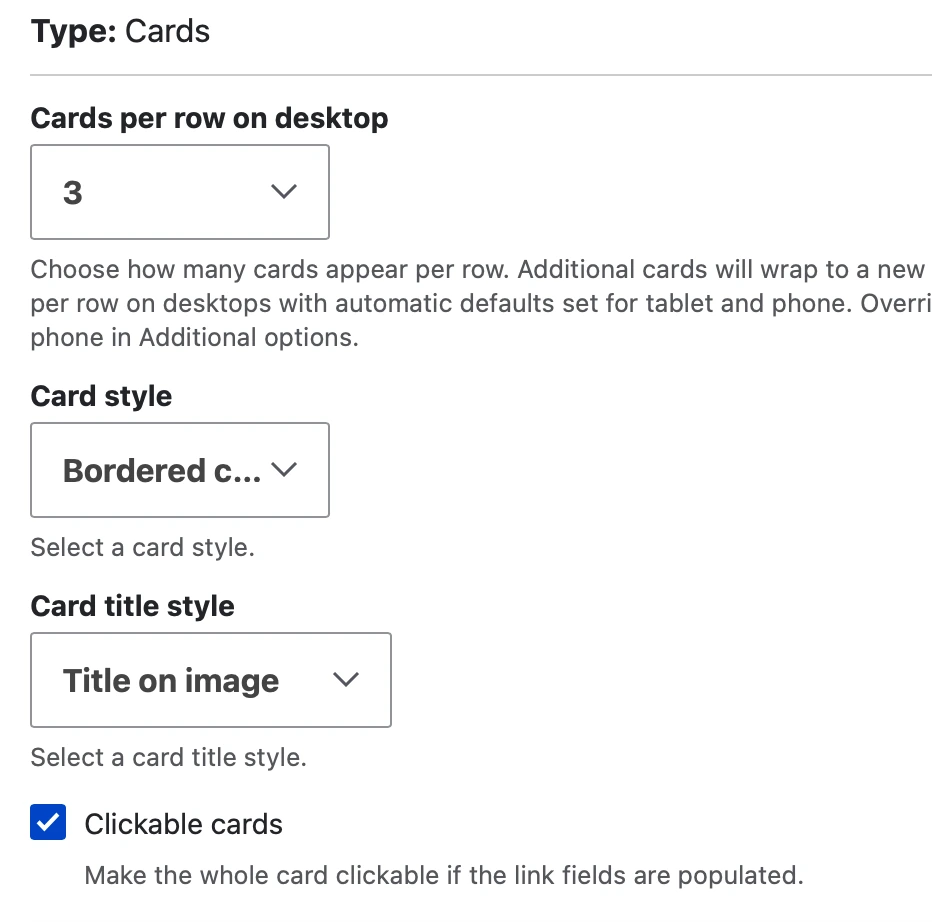
- Select how many cards will be in a row on your page. We recommend using 3 cards per row on desktop since our pages usually include a sidebar navigation, which takes up some width.
- Select Bordered cards for card style and Title on image for card title style. Turn on Clickable cards so that the entire card becomes a link.
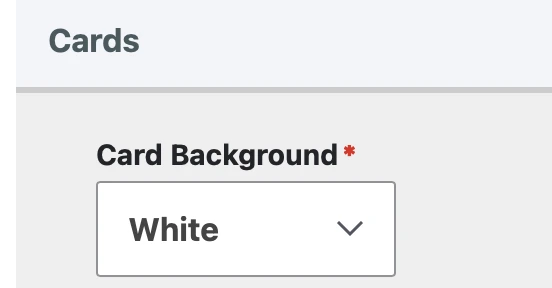
- For each card in the row, select White as the card background.
- Add content to the cards:
- Image
- Select Add media to upload an image. Format your images as a 4x3 aspect ratio. Photos that feature people can be the most engaging. Add alt text for accessibility.
- Select Add media to upload an image. Format your images as a 4x3 aspect ratio. Photos that feature people can be the most engaging. Add alt text for accessibility.
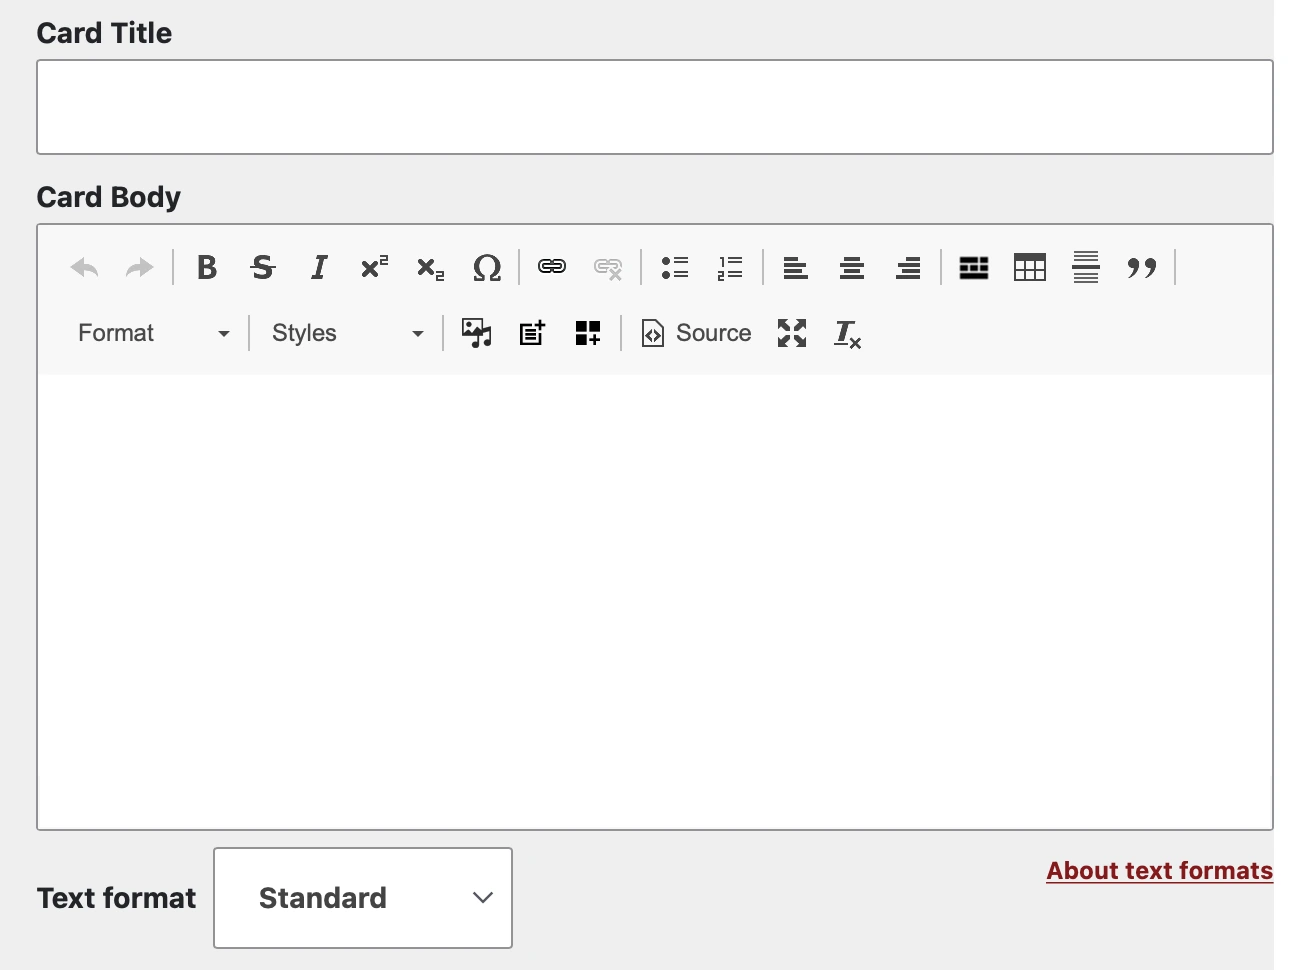
- Title and description
- Use a short and distinct phrase as the card’s title. It’s a good idea to start the card title with a verb, e.g. “get research help” or “request instructional space.”
- Use the card body space for a description that adds to the title. Keep the description short and sweet. A long description can extend the bottom of the card and make it look uncomfortably tall, and also affect other cards in the row.
- Choose “Standard” as the text format.
- Link:
- Name the text that will be linked in card link title, then paste the URL in card link URL. Choose "text link" as the card link style.
- Image
If you need more than 3 cards, consider adding another row. When you’re done, scroll down to the bottom of the page and save your changes.
Anchor links
An anchor link takes the user to a specific part of a webpage instead of landing them on the top. You can use an anchor link to navigate the user to another web page or a different part of the same page.
See an example: https://lib.arizona.edu/catalyst/equipment/sewing-machines#models. This link takes the user to the “Sewing machines” page, then immediately jumps to the “Models & technical details” section.
How to add an anchor link
Only content administrators have access to adding an anchor link. If you’re a content manager and would like to add an anchor link to your content, feel free to contact the UX team (Bob Liu or Aly Higgins) or send a request to web-support@lib.arizona.edu.
- Edit the destination page, then edit the content block that includes the particular section where you’d like the user to land.
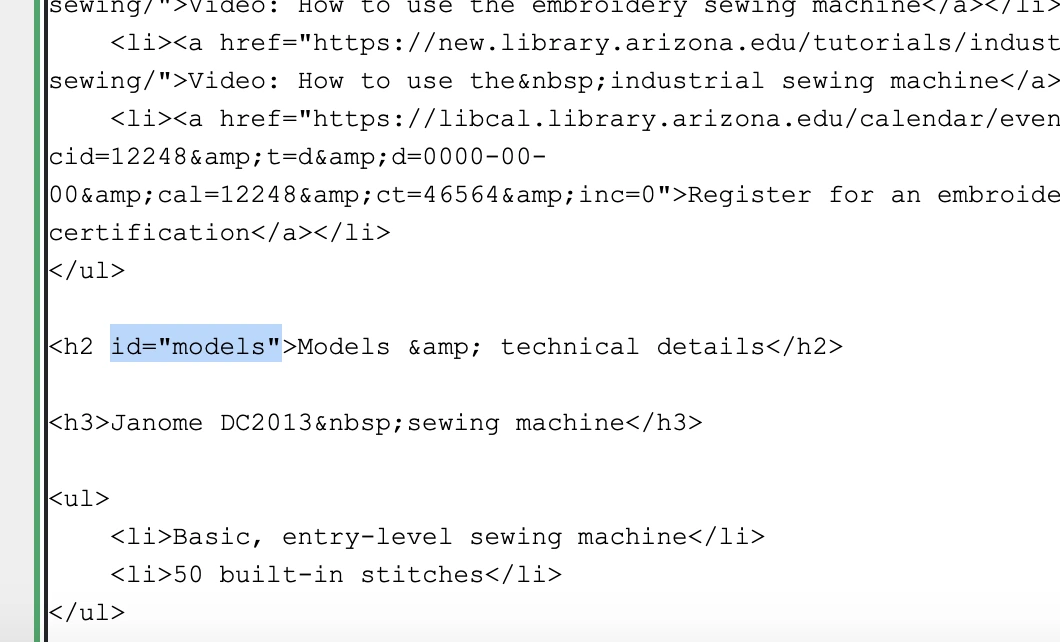
- Click Source in the editor.
- Find the HTML element you’d like to the anchor link to direct. Add a unique ID inside its HTML tag, e.g., id="models"
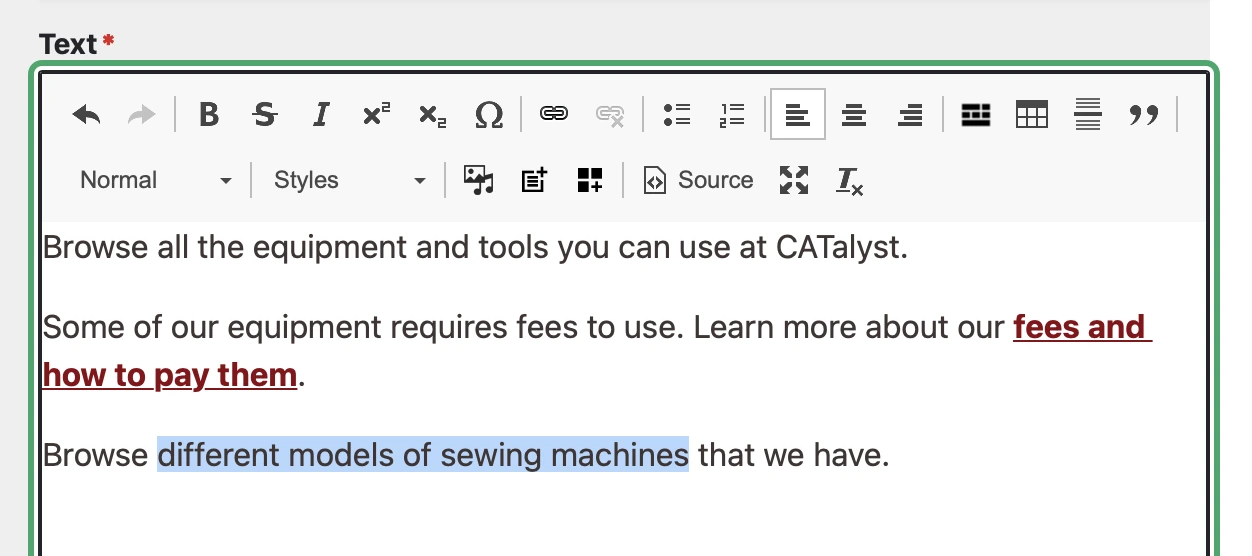
- Edit the source page where you’d like to add the anchor link. Select the text or button, and add a link.
- Paste the full URL of the destination page (or relative URL if both pages are in the same content management system). At the end of the URL, add a hashtag (#), immediately followed by the unique ID you just assigned to the HTML element on the destination page without spaces.
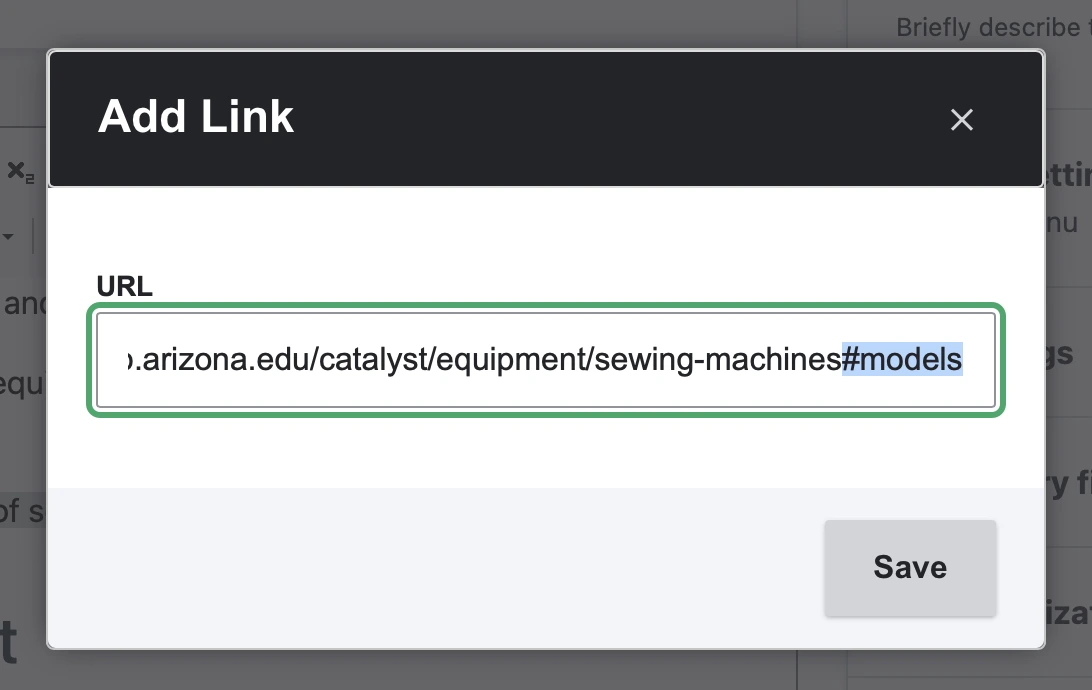
- Save the link, then select Save to publish your changes.
How to format anchor links on a page
Anchor links help create a preview of what content is on a page for users to scan and use to jump right to the content they want.
When using anchors links to create a preview what’s on the page, follow this format:
On this page (H2)
- Anchor link #1
- Anchor link #2
- Anchor link #3
This structure keeps the anchor links visible and provides a helpful table of contents for users to find what they’re looking for on the page. This should be the first piece of content you include on the page after the page’s title.